FCM 푸시 알림을 사용하는 방법
로그인 - Google 계정
하나의 계정으로 모든 Google 서비스를 Google 계정으로 로그인
accounts.google.com
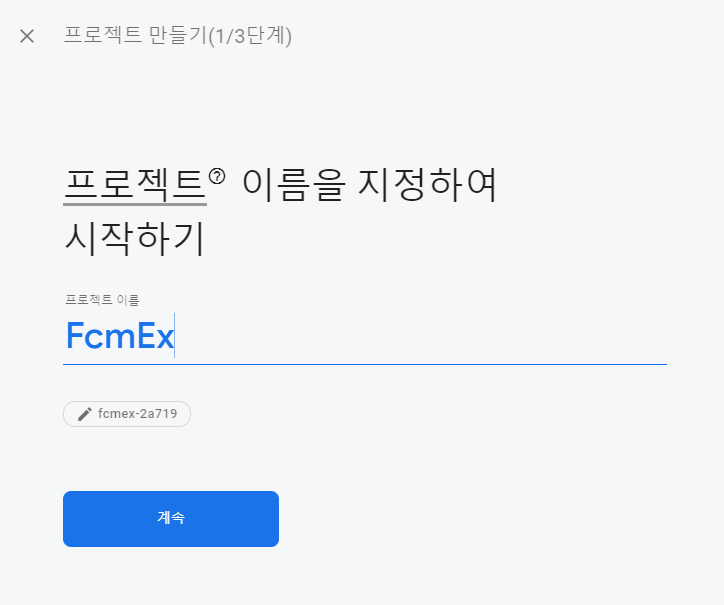
1. 파이어베이스 프로젝트 추가
2. 프로젝트 설정 -> 앱 등록 (Android 선택)


3. 앱 등록 절차 (앱 등록, 구성 파일 다운로드)
패키지 이름은 AndroidManifest.xml에서 확인 가능하고, SHA-1 인증서는 signingReport을 더블클릭하면 AndroidStudio 콘솔에서 확인할 수 있습니다.


4. 앱 등록 절차 (파이어베이스 SDK 추가)
해당 절차는 파이어베이스 절차에 따라 그대로 진행해주시면 됩니다.
AndroidManifest.xml에서 아래와 같이 Permission과 Service를 추가한 후 아래의 코드를 사용한 후 이 부분이 중요합니다. "클라우드 메시징" 라이브러리도 추가해주시면 됩니다. 관련 정보는 아래에서 확인할 수 있습니다.
firebase.google.com/docs/android/setup?hl=ko%EF%BB%BF
Android 프로젝트에 Firebase 추가
기본 요건 Android 프로젝트가 준비되지 않았다면 빠른 시작 샘플 중 하나를 다운로드하여 Firebase 제품을 사용해 볼 수 있습니다. 다음 옵션 중 하나를 사용하여 Android 앱을 Firebase에 연결할 수 있
firebase.google.com
FirebaseMessagingService는 백그라운드에서 앱의 알람을 수신하는 것 외에 다른 방식으로 메시지를 처리하려는 경우에 필요합니다. 포그라운드 앱의 알림, 수신, 데이터 페이로드 수신, 업스트림 메시지 전송 등을 수행하려면 이 서비스를 확장해주시면 됩니다.
<uses-permission android:name="android.permission.INTERNET" />

    <application
         ...>
        <activity android:name=".MainActivity">
            <intent-filter>
                <action android:name="android.intent.action.MAIN" />
                <category android:name="android.intent.category.LAUNCHER" />
            </intent-filter>
        </activity>

        <service
            android:name=".MyFirebaseMessagingService"
            android:enabled="true"
            android:exported="true">
            <intent-filter>
                <action android:name="com.google.firebase.MESSAGING_EVENT" />
            </intent-filter>
        </service>
    </application>
package com.example.fcmex
import android.app.NotificationChannel
import android.app.NotificationManager
import android.app.PendingIntent
import android.content.ContentValues.TAG
import android.content.Context
import android.content.Intent
import android.media.RingtoneManager
import android.os.Build
import android.os.Build.VERSION_CODES.O
import android.util.Log
import androidx.core.app.NotificationCompat
import com.google.firebase.messaging.FirebaseMessagingService
import com.google.firebase.messaging.RemoteMessage
class MyFirebaseMessagingService : FirebaseMessagingService() {
// 토큰이 새로 만들어질때나 refresh 되는 경우
override fun onNewToken(token: String) {
Log.d(TAG, "new Token: $token")
// 토큰 값을 따로 저장해둔다.
//val pref = this.getSharedPreferences("token", Context.MODE_PRIVATE)
//val editor = pref.edit()
//editor.putString("token", token).apply()
//editor.commit()
sendRegistrationToServer(token)
Log.d(TAG, "성공적으로 토큰을 저장함")
super.onNewToken(token)
}
private fun sendRegistrationToServer(token: String) {
}
// 메시지를 받을 경우
override fun onMessageReceived(remoteMessage: RemoteMessage) {
Log.d(TAG, "From: " + remoteMessage.from)
// Notification 메시지를 수신할 경우는
// remoteMessage.notification?.body!! 여기에 내용이 저장되어있다.
if (remoteMessage.notification != null && remoteMessage.data.isNotEmpty()){
Log.d(TAG, "공지 도착 : 데이터 있습니다.")
Log.d(TAG, "Notification Message Title: " + remoteMessage.notification?.title)
Log.d(TAG, "Notification Message Body: " + remoteMessage.notification?.body)
Log.d(TAG, "바디 : ${remoteMessage.data["body"].toString()}")
Log.d(TAG, "타이틀 : ${remoteMessage.data["title"].toString()}")
sendNotification(remoteMessage)
}else if(remoteMessage.notification != null && !remoteMessage.data.isNotEmpty()){
Log.d(TAG, "공지 도착 : 데이터 없습니다.")
Log.d(TAG, "Notification Message Title: " + remoteMessage.notification?.title)
Log.d(TAG, "Notification Message Body: " + remoteMessage.notification?.body)
sendNotification(remoteMessage)
}
else {
Log.d(TAG, "수신에러 : Notification가 비어있습니다. 메시지를 수신하지 못했습니다.")
Log.d(TAG, "Notification값 : ${remoteMessage.notification.toString()}")
Log.d(TAG, "수신에러 : data가 비어있습니다. 메시지를 수신하지 못했습니다.")
Log.d(TAG, "data값 : ${remoteMessage.data.toString()}")
}
}
private fun sendNotification(remoteMessage: RemoteMessage) {
// RequestCode, Id를 고유값으로 지정하여 알림이 개별 표시되도록 함
val uniId: Int = (System.currentTimeMillis() / 7).toInt()
// 일회용 PendingIntent
// PendingIntent : Intent 의 실행 권한을 외부의 어플리케이션에게 위임한다.
val intent = Intent(this, MainActivity::class.java)
intent.addFlags(Intent.FLAG_ACTIVITY_CLEAR_TOP) // Activity Stack 을 경로만 남긴다. A-B-C-D-B => A-B
//intent.addFlags(Intent.FLAG_ACTIVITY_SINGLE_TOP)
val pendingIntent = PendingIntent.getActivity(this, uniId, intent, PendingIntent.FLAG_ONE_SHOT)
// 알림 채널 이름
val channelId = resources.getString(R.string.firebase_notification_channel_id)
// 알림 소리
val soundUri = RingtoneManager.getDefaultUri(RingtoneManager.TYPE_NOTIFICATION)
val notificationBuilder = NotificationCompat.Builder(this, channelId)
//data가 있을땐 제목, 메시지를 data 값으로 변경
if (remoteMessage.data.isNotEmpty()){
// 알림에 대한 UI 정보와 작업을 지정한다.
notificationBuilder.setSmallIcon(R.mipmap.ic_launcher) // 아이콘 설정
.setContentTitle(remoteMessage.data["title"].toString()) // 제목
.setContentText("실행 중 : "+ remoteMessage.data["body"].toString()) // 메시지 내용
.setAutoCancel(true)
.setSound(soundUri) // 알림 소리
.setContentIntent(pendingIntent) // 알림 실행 시 Intent
}else{
// 알림에 대한 UI 정보와 작업을 지정한다.
notificationBuilder.setSmallIcon(R.mipmap.ic_launcher) // 아이콘 설정
.setContentTitle(remoteMessage.notification!!.title.toString()) // 제목
.setContentText("실행 중 : "+ remoteMessage.notification!!.body.toString()) // 메시지 내용
.setAutoCancel(true)
.setSound(soundUri) // 알림 소리
.setContentIntent(pendingIntent) // 알림 실행 시 Intent
}
val notificationManager =
getSystemService(Context.NOTIFICATION_SERVICE) as NotificationManager
// 오레오 버전 이후에는 채널이 필요하다.
if (Build.VERSION.CODENAME >= O.toString()) {
val channel = NotificationChannel(channelId, "Notice", NotificationManager.IMPORTANCE_DEFAULT)
notificationManager.createNotificationChannel(channel)
}
// 알림 생성
Log.d(TAG, "푸시 알람을 생성합니다.")
notificationManager.notify(uniId, notificationBuilder.build())
}
}
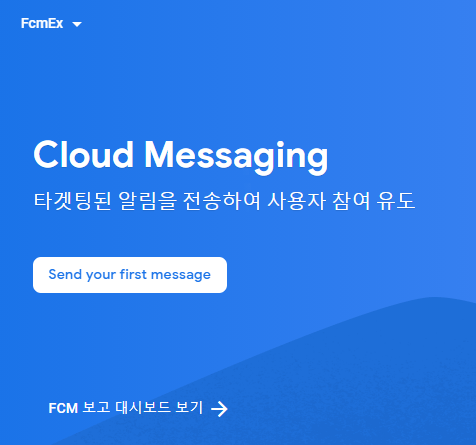
5. Cloud Messaging 생성
이제 푸시 알림을 테스트하기 위해 메시지를 생성해보겠습니다.

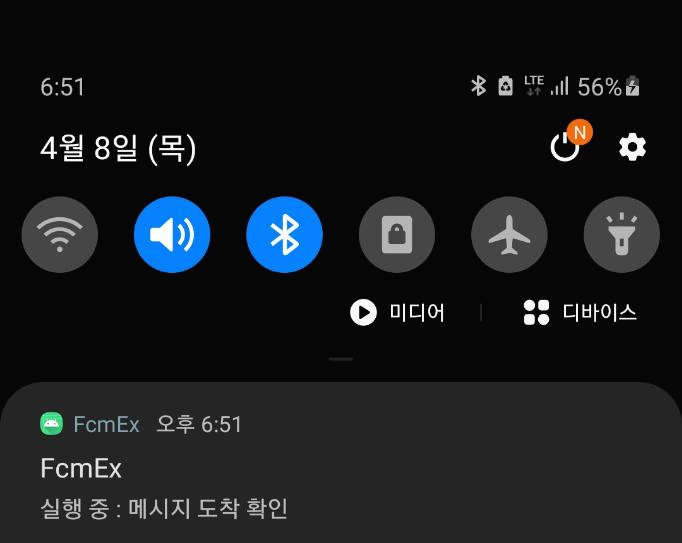
(1. 알림
- 알림 제목 : FcmEx
- 알림 텍스트 : 메시지 도착 확인
(2. 타겟
- 사용자 타겟팅 조건 : 앱 -> 패키지 선택
(3. 예약
- 대상 사용자에게 전송 : 지금
6. 푸시 알림 확인
- 백그라운드의 경우 포그라운드의 경우

7. 예외
만약 메시지가 도착하지 않는 경우 google-services.json 파일의 코드를 확인해주세요.

"api_key": [
        {
          "current_key": "AIzaSyDpsd...cSdtXeDILfk"
        }
      ]
구글 클라우드 플랫폼에서 API 키 값의 제한 세항을 설정한 경우 Firebase Installations API를 추가해주지 않으면 메시지가 도착하지 않습니다.
'Android' 카테고리의 다른 글
| [Android] Activity 생명주기 (0) | 2021.04.09 |
|---|---|
| AndroidProgramming - Listener 등록 (Kotlin) (0) | 2021.04.08 |
| Kakao Map API (카카오 지도 API) (0) | 2021.03.29 |
| Extension functions(확장 함수) (0) | 2021.03.28 |
| StateBar (상태바) : 색상 변경 (0) | 2021.03.28 |

